venerdì 12 aprile 2024

AX2012/D365- HOW TO EXTRACT ALL MAINACCOUNT ALLOCATION RULES by code X++

This article is a merely starting point.
In AX2012 / D365 we can handle the cost allocation by parameters.

Ledger allocation rules are used to automatically calculate and generate allocation journals and account entries for the allocation of ledger balances or fixed amounts. Allocation methods can be variable or fixed. The allocation is based on the transaction currency value.

  • We can split the cost to different/several Financial Dimensions (in percentage); By Company etc...

Microsoft documentation:
AX2012:
https://learn.microsoft.com/en-us/dynamicsax-2012/appuser-itpro/create-an-allocation-rule

D365:
https://learn.microsoft.com/en-us/dynamics365/finance/general-ledger/ledger-allocation-rules

Data to extract:

what I would like to extract

JOB x++
By code x++ it is possible. The job below can exttract in a infolog the data:
it be can improve

Str1260 mainAccount_Name, DimFinanancial_Name;
MainAccount account;
DimensionAttributeValueSetItem valueSetItem;
DimensionAttributeValue dimAttrValue;
DimensionAttribute dimAttr;
Str1260 dimensionAttributeNames;
LedgerAllocation allocation;
DefaultDimensionView dimensionView;
DimensionAttribute dimensionAttribute; 
   
 while select allocation
 {
     select Name, MainAccountId from account where account.RecId ==    allocation.FromMainAccount;

        mainAccount_Name = account.Name; // to chek the value
      
     while select dimAttr
        exists join dimAttrValue
            where dimAttrValue.DimensionAttribute == dimAttr.RecId
        exists join valueSetItem
            where valueSetItem.DimensionAttributeValue == dimAttrValue.RecId
                && valueSetItem.DimensionAttributeValueSet == allocation.ToDefaultDimension
        {

            DimFinanancial_Name= dimAttr.Name; // to check the value
           
                    select firstOnly dimensionView
                    where dimensionView.DefaultDimension == allocation.ToDefaultDimension
                join dimensionAttribute
                    where dimensionView.Name == dimensionAttribute.Name
                    && dimensionView.Name == DimFinanancial_Name;
      // OUTPUT
            info(strFmt("%1;%2;%3;%4;%5",
            mainAccount_Name, account.MainAccountId,
            DimFinanancial_Name,dimensionView.DisplayValue,allocation.Value));

        }       
    } 
RESULT:


lunedì 1 aprile 2024

AX 2012 - D365FFO - Aggiungere controlli ad una form dinamicamente e gestire gli eventi (registerOverrideMethod)

In questo post vediamo come aggiungere a run time dei controlli ad una form e gestire gli eventi dei controlli. 

La form di base conterrà un button group a cui aggiungeremo tre pulsanti ed un gruppo a cui aggiungeremo un enumerato ed una stringa. 

Dei tre pulsanti gestiamo l'evento mouseDown (in D365 l'evento mouseDown è deprecato) per capire se il pulsante è stato premuto col pulsante destro oppure col sinistro; dell'enumerato gestiamo l'evento selectionChanged e del campo stringa l'evento modified.

Sia l'aggiunta dei controlli che gli event handler vanno aggiunti nella init della form:

 public void init()  
 {  
   int         i;  
   FormButtonControl  button;  
   FormComboBoxControl comboBox;  
   FormStringControl  stringControl;  
   
   super();  
   
   for(i = 0; i < 3; i++)  
   {  
     button = ButtonGroup.addControl(FormControlType::Button, strFmt("button_%1",i+1));  
     button.text(strFmt("%1",i+1));  
     button.registerOverrideMethod(methodStr(FormButtonControl, mouseDown), identifierStr(buttonMouseDown), this);  
   }  
     
   comboBox = ControlGroup.addControl(FormControlType::ComboBox, "InventCustVend_Combo");  
   comboBox.enumType(enumNum(ModuleInventCustVend));  
   comboBox.registerOverrideMethod(methodStr(FormComboBoxControl, selectionChange), identifierStr(ComboSelectionChange), this);  
     
   stringControl = ControlGroup.addControl(FormControlType::String, "Description_Text");  
   stringControl.extendedDataType(extendedTypeNum(Description));  
   stringControl.registerOverrideMethod(methodStr(FormStringControl, modified), identifierStr(modifiedString), this);    
 }  
I tre event handler vanno aggiunti a livello di form:
 public void buttonMouseDown(int _x, int _y, int _button, boolean _Ctrl, boolean _Shift,FormButtonControl _btn)  
 {  
   switch(_button)  
   {  
     case 1:  
       info(strFmt("hai premuto il bottone '%1' col pulsante %2",_btn.name(),"sinistro"));  
       break;  
   
     case 2:  
       info(strFmt("hai premuto il bottone '%1' col pulsante %2",_btn.name(),"destro"));  
break; } }
 public int comboSelectionChange(FormComboBoxControl _comboBox)  
 {  
   info(strFmt("L'enumerato è cambiato %1",_comboBox.selection()));  
     
   return 1;  
 }  
 public boolean modifiedString(FormStringControl _stringControl)  
 {  
   boolean ret = true;  
     
   info(strFmt("nuovo valore '%1'",_stringControl.text()));  
     
   return ret;  
 }  
Tutti i metodi per gestire gli eventi prendono il controllo come parametro. Se l'event prevede altri parametri standard, come nel caso mouseDown, il controllo và aggiunto come ultimo parametro.

martedì 12 marzo 2024

AX 2012 - Job per scrivere i metodi di una classe in un unico file di testo

Questo semplice job che ho scritto può essere di aiuto quando si deve migrare il codice di una classe da ax 2012 a D365FFO. 

Come sappiamo in ax 2012 il sorgente di una classe viene mostrato "spezzettato" per singolo metodo cioè:


Mentre in D365 il sorgente è contenuto in un'unica schermata. Dobbiamo quindi aprire ciascun metodo ed incollarlo in Visual Studio.

Se la classe contiene molti metodi l'operazione può risultare pesante.

Il job prende come input il nome della classe e produce un unico file .txt con tutti i metodi, pronti per essere incollati in Visual studio:

 static void LIL_Ax2012To365ClassesSourceCode(Args _args)  
 {  
   SysDictClass      dictClass;  
   SysDictMethod      dictMethod;  
   int           i;  
   Source         Source;  
   TextIo         textIo;  
   Set           methodsSet;  
   SetEnumerator      methodsSetEnum;  
   str           filePath;  
   ClassId         classId;  
   str           addSpaceToNewLineRegex;  
   container        conFilter = ["TXT", "*.txt"];  
   #File  
   #xppTexts  
   
   classId = classNum(Tutorial_RunbaseBatch);  
   
   dictClass = new SysDictClass(classId);  
   
   for (i=1;i<=dictClass.objectMethodCnt();i++)  
   {  
     dictMethod = new SysDictMethod(UtilElementType::ClassInstanceMethod, dictClass.id(), dictClass.objectMethod(i));  
   
     if(dictMethod.name() == identifierStr(classDeclaration))  
     {  
       Source += dictMethod.getSource() + #newline;  
   
       Source = strRem(Source, "}");  
     }  
   }  
   
   methodsSet = dictClass.methods(true,true,false);  
   
   methodsSetEnum = methodsSet.getEnumerator();  
   
   methodsSetEnum.reset();  
   
   while(methodsSetEnum.moveNext())  
   {  
     dictMethod = methodsSetEnum.current();  
   
     Source += dictMethod.getSource();  
   
     Source += #newline + #newline;  
   }  
   
   source += "}";  
   
   filePath = WinAPI::getSaveFileName(  
     0,  
     conFilter,  
     "",  
     "@SYS56237",  
     ".txt",  
     dictClass.name());  
   
   textIo = new TextIo(filePath, #IO_WRITE);  
   
   textIo.write(Source);  
 }  

venerdì 24 novembre 2023

D365FFO - How to release to warehouse cross docking works even in case of warehouse "full reservation" release method

 In case in the warehouse setup we have the following parameters set 

-    Requirement for inventory reservation: Require full reservation

-    Insufficient quantity response: Generate an error


It is still possible to release a sales order to warehouse even if there is no stock but at least a purchase order is marked against a sales order.

The crossdocking template is set in the following way:

-    Demand requirements set as Marking

-    Work template defined in the work template

-    Supply source defined as "Purchase order"

-    Location type: Location directives


We create the sales order as follows.


We create the purchase order directly from the sales order as follows.


In order to release the sales order to the warehouse it is required to launch the batch procedure as follows:

-    The value "Quantity to release": Reserved physically and cross dock


The sales order generates the following shipment.


The shipment has a planned cross docking defined as follows.

Instead if we use the fulfillment policy on the sales order header blocking the release to warehouse in case of missing items in the stock, the system is not able to skip the planned cross docking lines.


giovedì 23 novembre 2023

D365FFO - How to create a transfer order using the warehouse mobile app

Using the warehouse mobile app it is possible to generate a transfer order declaring the warehouse to we want to ship the goods and the license plate we want to move.

Before performing the transaction we have to set the following menu item.


Then we have to make sure that we have in stock (in the starting warehouse) the license plate that we want to move.


Then we access, in the warehouse mobile app, the menu item previously created.


We scan the destination warehouse.


We scan the license plate we want to move.


Once we complete the transfer order we can click on the button complete order underlined above.

Then we have to run the procedure "Process warehouse app events".

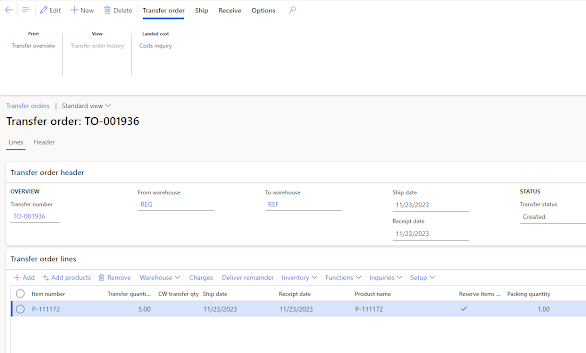
The transfer order will be then generated as follows.


martedì 21 novembre 2023

D365FFO - Register material consumption using warehouse mobile device

It is now possible to register the material consumption for production orders directly using the warehouse mobile device. In order to do it, the following feature "Register material consumption on the mobile app on a scale unit" must be switched on.


We create a production order, not setting any location directive for picking components or wave / work templates. At the end we release the production order not generating any work for picking goods, as reported below.


Then we can start the production order using the mobile app or the feature on the production order form (ensuring to not consume components while doing it).


After that we can access the warehouse mobile app feature related to the following menu item defined into the parameters.


Using the mobile app it is possible to generate automatically a picking list journal directly related to the production order.


After scanning the production order, it is required to scan the picking location as reported below.


Then it is required to scan all the other information:

- itemid

- batchid (if needed)

- serial number (if needed)

and to confirm the quantity to be picked as shown below.


Once completed the picking procedure the button Done must be clicked as reported below.


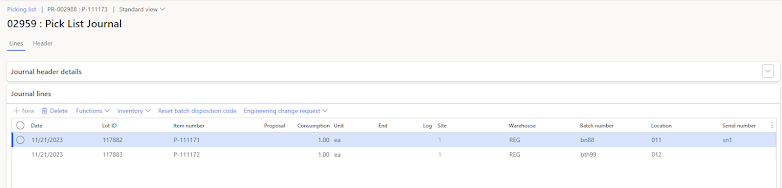
After clicking on the Done the system generates a picking journal posted against the production order scanned during the procedure.


lunedì 20 novembre 2023

D365FFO - How to backflush components using RAF from warehouse mobile device

In the warehouse mobile device app there is the option to report as finish (RAF from now on) the production orders using for instance the following setup in the menu item for mobile app.

While reporting as finished a production order it can be needed to consume all the production order components (backflush of components).

In order to do it the following parameters (Respect flushing principle during overpicking set to YES) must be set in the report as finished warehouse app menu item.


And the following must be set in the production order defaults form under the tab "Report as finished":

-    Picking list journal name

-    Automatic bom consumption set to Flushing principle


Then on the Bom lines that we want to consume at the report as finished of the production orders we have to set as flushing principle "Finish" (as reported below).


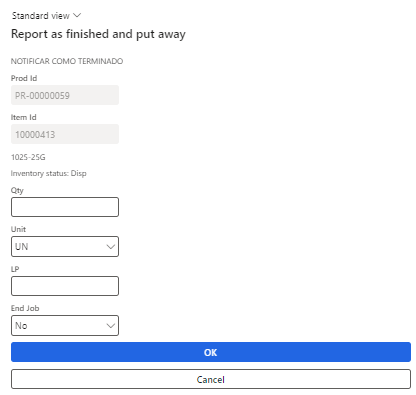
Once we are reporting as finished a production order using the warehouse mobile app (as below)


We get the following journals posted on the production order related.


A picking list journal for consuming the components of the production order and a report as finished journal for producing the final item.